Hostinger + WordPress - Start A Blog Website With Hostinger India In 2021


Do you want to create a WordPress blog in 5 minutes?
If yes, then in this post I am going to teach you how to start a WordPress blog in five minutes using Hostinger India and Bluehost India even if you're a beginner.
I started my first blog in 2009? That was 12 years ago. We are in 2021 now and things are totally different as compared to 2009.
Back then, I've used a free blogging platform WordPress to start my blogging journey.
It was not easy using WordPress in the year 2009, tech-wise. My blog address was startblog.wordpress.com where the main domain was WordPress.
Another drawback of this was free blogging platforms like Blogger, WordPress doesn’t give you 100% control over your websites.
If you violate any of their terms or conditions, they keep all the rights to delete your site without even notifying you.
That's really bad about free blogging platforms. And that is the reason I highly recommend you to start a self-hosted WordPress blog under 2000 rupees or less per year.
I am sure you are ready to spend 2000 rupees to make a blog that will make money for you in future.
A self-hosted WordPress website gives you many benefits:
- Easy to get started. You can launch your website in 5 minutes.
- Full control of your site. You can customize the design as per your needs.
- WordPress is an SEO friendly platform.
- Tons of free plugins & themes are available to get started
- Tons of monetization options.
- And the list goes on...
Now let's understand what all it takes to create a WordPress blog of your own in just five minutes.
To build your own self-hosted WordPress website, you need just two things.
1) Domain Name of Your Choice
2) Web Hosting Platform
If you're just starting out and looking for an affordable yet reliable web hosting service in India, I recommend you 2 options: Hostinger India and Bluehost India. They also offer you a free domain. You can choose anyone out of these two to start a blog now.
We used Bluehost India on three websites and Hostinger India for five websites for a long time now and we never faced any issues with it. Both the platforms are extremely affordable even if you're a beginner or student you can buy their plans.
Now let's understand how you can launch your WordPress blog using Hostinger India.
I hope you are ready. Let’s jump into the details.
4 Steps To Starting a WordPress Blog Website on Hostinger India

Here are four easy steps to follow to create your WordPress website in 5 minutes using Hostinger India web hosting.
Step 1: Visit this link to get an exclusive offer for Start-Blog.In readers from Hostinger India.
Quick note: Hostinger India pricing plans start at just ₹ 79/mo you use our special link, to get a free domain name with a premium plan.

Step 2: Click on the Start Now button on the Hostinger India website to continue.
Head over to WordPress Hosting India and then you can choose your desired web hosting plan depending on your budget.
I recommend you to try their Best Value plan as it allows you to install as many websites or domains as you want on a single hosting account. Click on Add to cart to proceed further.

Step 3: In the next step, you can choose a domain.
Hostiner India offers a free domain name on Premium & the best value plan. Book your domain name and click on checkout.
Step 4: This is the final step where you need to create an account with Hostinger India.
You can also use your Gmail account or Facebook account to sign up for it. Then, finish the payment.
Once you make the payment, you will receive a welcome email on your given email id from Hostinger India. Login to your Hostinger account and Install WordPress.
How to Install WordPress in Hostinger
Learn to use Hostinger’s WordPress Auto-Installer for the installation process:
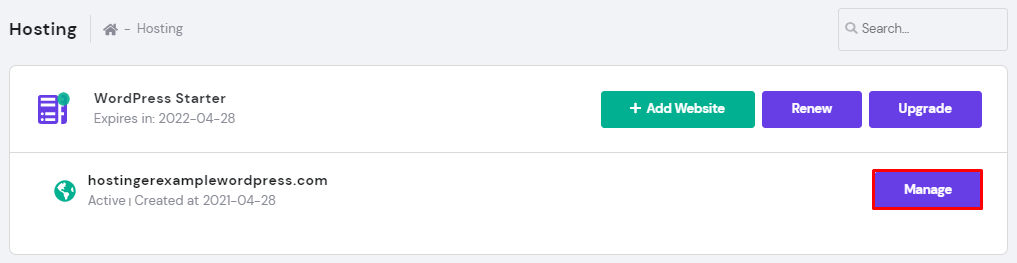
- Log in to your Hostinger web hosting account and click Hosting on the main menu.

- Choose the domain name for your future WordPress site and click the Manage button to access your hosting Panel.
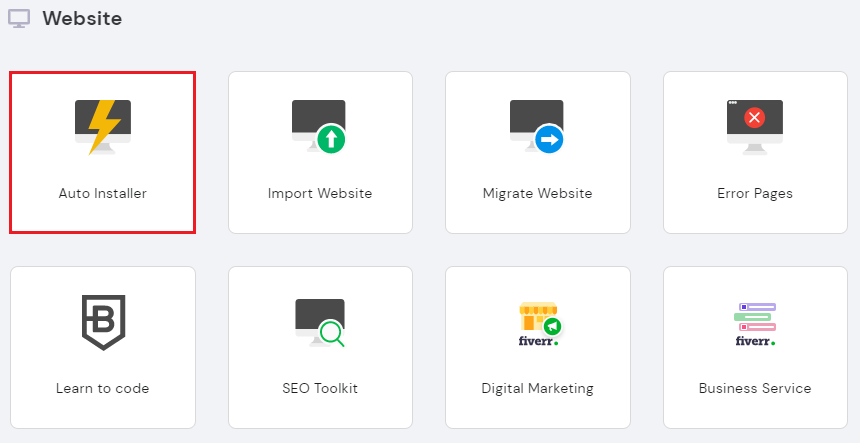
- On your hPanel Dashboard, locate the Auto Installer button under the Website section.
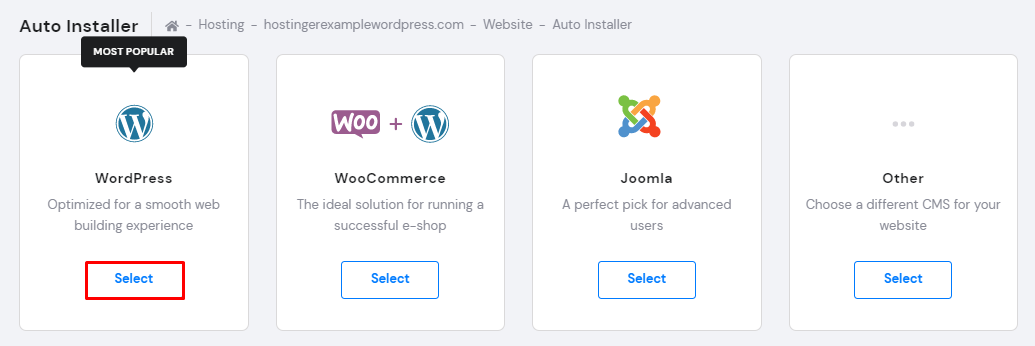
- Under Auto Installer, choose WordPress and click the Select button.
- Fill out the Install WordPress form:
-> The Administrator Username, Password, and Email are for the WordPress login. They do not need to be the same as the web hosting login information.
-> Create a WordPress Website Title.
-> Choose your preferred language.
-> Select the Always update to the latest available version option for automatic updates.
-> After filling out all necessary information, hit the Install button.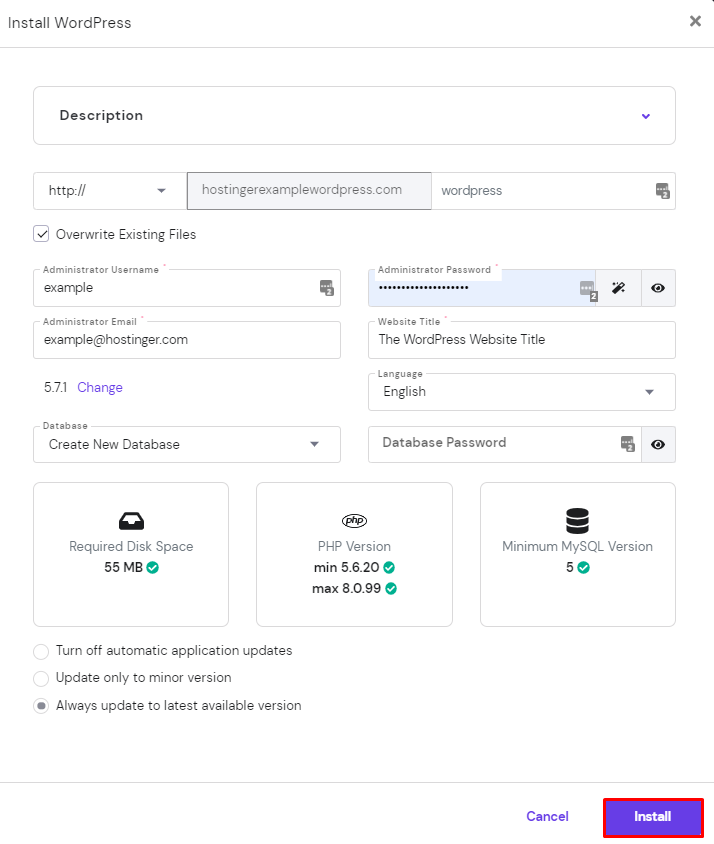
Once you successfully Installed WordPress, You need to follow these 3 steps to log in to your WordPress dashboard.
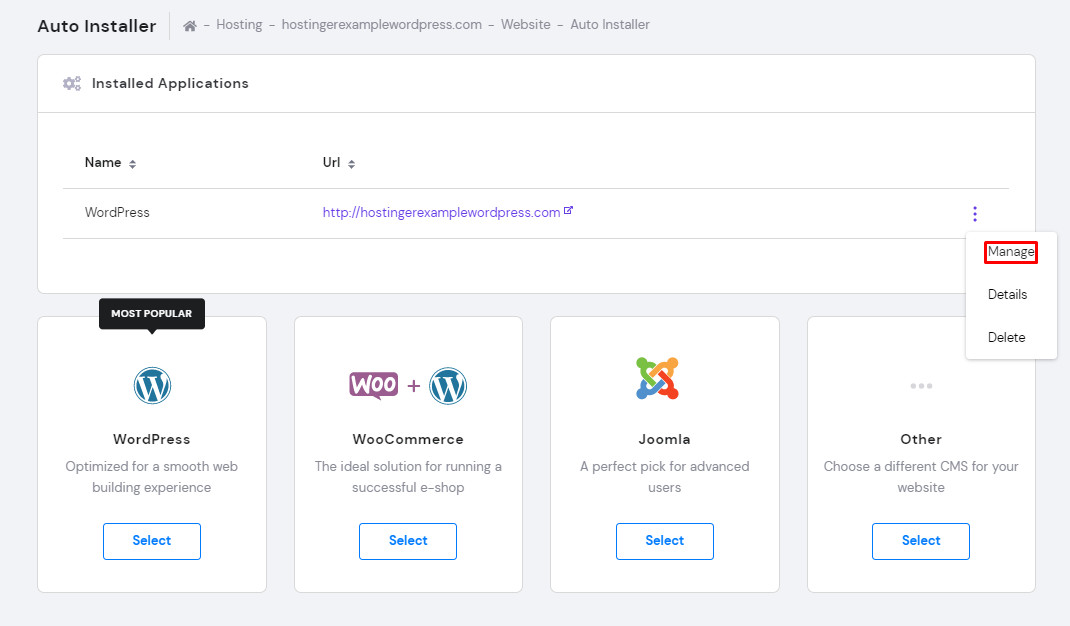
- Hostinger will show Installed Applications. Click on the three dots next to your WordPress URL. Select Manage to go to My WordPress Dashboard.
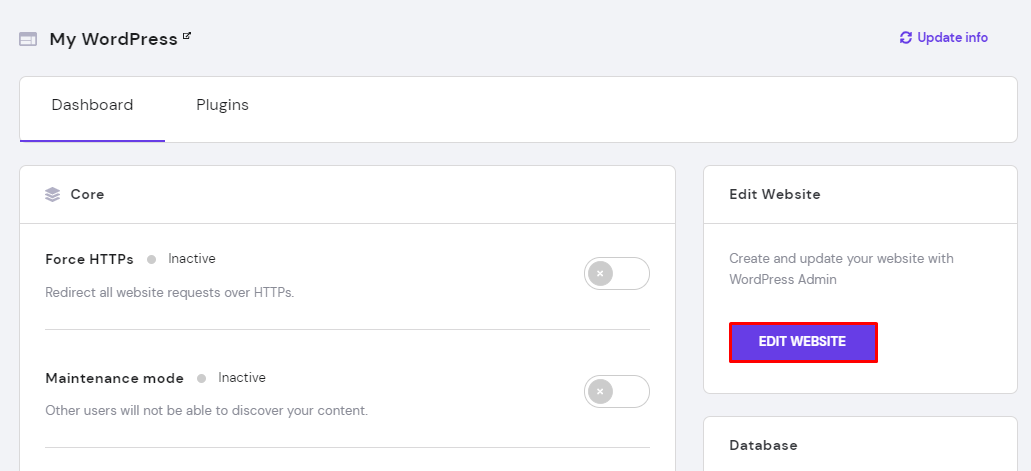
- On the WordPress Dashboard, click the Edit Website button to access WordPress Admin.
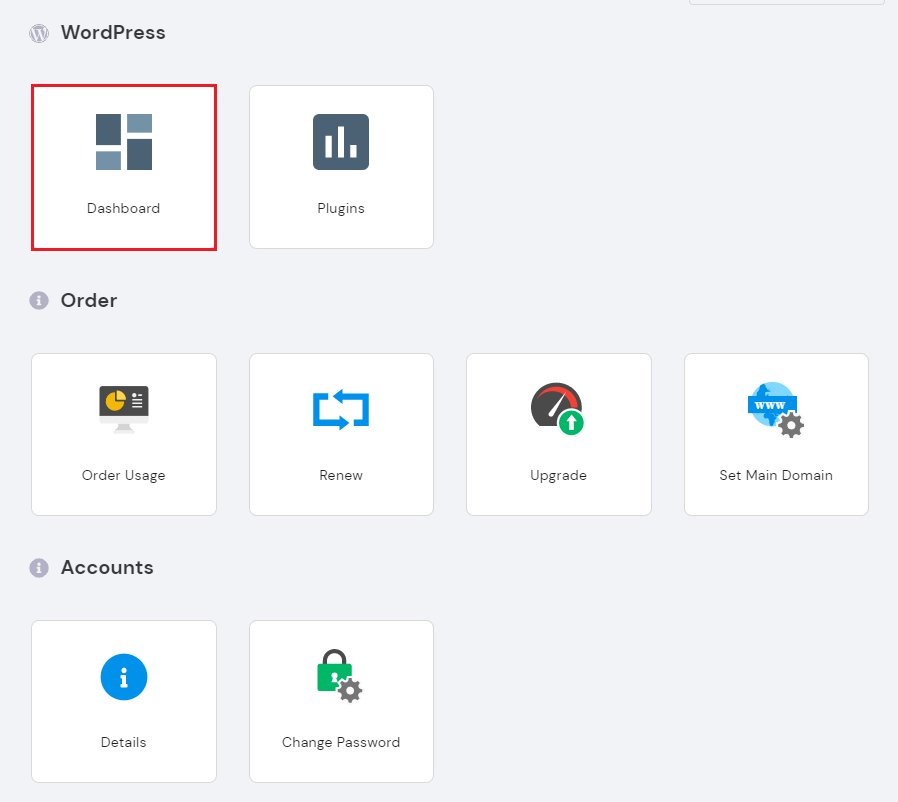
- Another way to access the WordPress Dashboard is by clicking the Dashboard button under WordPress on the hPanel.
That’s it. If you need any help with setting up your blog with Hostinger India, just let me know in the comment section below so I can help you!
Once you’re done with setting up your WordPress blog with Hostinger India, you can start customizing your website in the WordPress Dashboard.
Here's a detailed step by step tutorial that teaches you what to do next after starting your WordPress blog.
Once you install WordPress, you can install essential WordPress plugins to take your blog to the next level. You can click here to learn more about essential WP plugins.
I hope you enjoyed this guide. Do like and share it on social media so that anyone can launch their website in 5 minutes using Hostinger India.
No comments:
Post a Comment